Creating An ERC-20 Token Using Solidity.

The ERC-20(Ethereum Requests For Comments 20) is a standard for creating fungible tokens on the Ethereum network. it was proposed by Fabian Vogelsteller in November 2015, as a Token Standard that implements an API for tokens within Smart Contracts.
Token Standard 🪙🪙🪙
There are functions and events that if implemented in your smart contract can be called an ERC-20 Token.
Functions 🏎️🏎️🏎️
name: This is a view function that aids the client(Metamask, Block Explorer, and your frontend) retrieve the name of the Token.
symbol: This is also a view function that aids the client retrieve the symbol of the Token e.g(BNB, ETH, BTC, SHIBA, ...).
totalSupply: This is a view function that retrieves the total amount tokens you have in circulation.
decimals: This is also a view function that retrieves the decimal value that your token uses. e.g Ether uses a decimal of
18, so when you transfer1 etheryour wallet actually transfer1 x 10^18which is the smallest unit of Ether calledwei.transfer: This is a function that handles the transfer of tokens between addresses.
approve: This is a function that lets you approve an address to spend a certain amount of tokens from your wallet. e.g when you want to sell or buy a Token you are approving the smart contract to 'spend' that certain amount you want to buy or sell.
transferFrom: This is the function that handles the transfer of tokens from the addresses you have allowed to spend from your wallet.
allowance: This is a view function that returns the amount a spender can still spend from your wallet.
Events🚨🚨🚨
Events are used to notify the client that a certain action has been carried out, and it is also a cheap way to store data in our transactions logs.
Transfer: This is an event that is emitted or triggered anytime there has been a transfer of tokens. it emits three values, who is sending, where they are sending to, and how much was sent.
Approval: This event is emitted when an address approves another address the ability to make transfers from their Tokens. it emits three values also, the address, the approved address, and how much can spent.
Now that you have been introduced to what an ERC-20 Token standard looks like, it might not be clear at first but as we go ahead and build our Token I believe everything will become clearer.
Let's Build🚀🚀🚀
We are going to be building a smart contract for a Token that anytime a transaction occurs 10% charges is taken and burnt😱. Don't worry I'm here take you through the process step by step. let's go 🚀🚀🚀
1. Create An Empty Contract 🗋
There are lots tools that can enable us to write solidity and build on the Ethereum virtual machine but, for this practical we are going to be using REMIX IDE. I have initialized an empty contract for you here
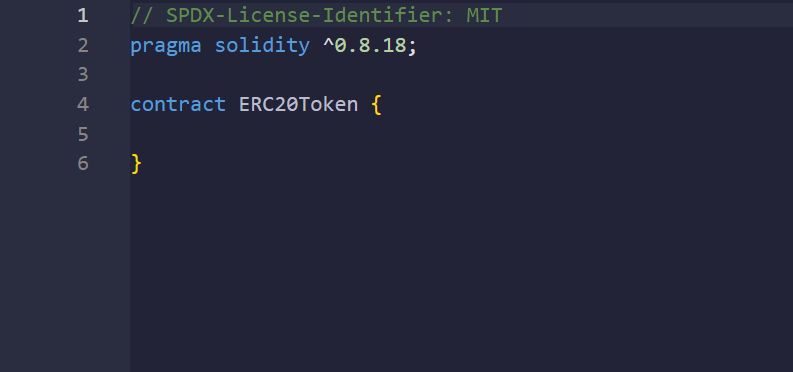
When you click the link you should see something like this. So what are these lines of code doing?
Line 1: SPDX(Software Package Data Exchange)-License-Identifier: MIT is used to license our software which is our code. so using the
MITlicense we are just saying that anyone who obtains our code can edit, upgrade, downgrade, practically, do whatever they want to do with it.Line 2:
pragma solidity ^0.8.18;what this line is doing is basically telling our compiler what versions of solidity compiler can compile our code to bytecode.Line 4: This is where we are creating our contract called ERC20Token.
2. Create Our State variables 🏚️
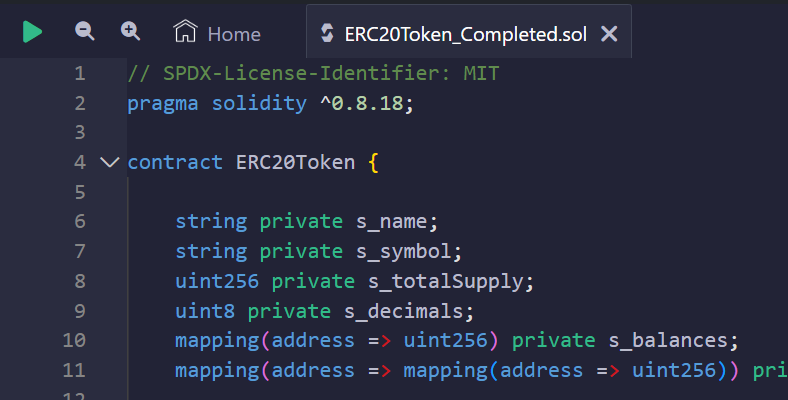
Now we are going create different states variables to store the name, symbol, totalSupply, decimals, approvedSpenders, address balances. so yeah let's go ahead.
// SPDX-License-Identifier: MIT
pragma solidity ^0.8.18;

contract ERC20Token {
    string private s_name;
    string private s_symbol;
    uint256 private s_totalSupply;
    uint8 private s_decimals;
    mapping(address => uint256) private s_balances;
    mapping(address => mapping(address => uint256)) private s_approvedSpenders;
}
Now we have created our state variables to store. we have the s_name variable that is private to only our contract and it is of type string , same with s_symbol. We also have our s_totalSupply and s_decimals they are both unsigned integers(uint) which means they only allow positive integers. and lastly we have our mappings of s_balances and s_approvedSpenders which are key => values data types. if you are familiar with JavaScript you can liken mapping to objects for example if it were to be in JavaScript we would have something like this:
const s_balances = {
    "0x1111111": 20000000000,
    "0x2222222": 30000000000
};
const s_approvedSpenders = {
    "0x111111": {
        "0x2222222": 2000000000
    },
    "0x333333": {
        "0x2222222": 2000000000
    },
}
Now let's move 🚀🚀🚀.
3. Add Our Constructor 🏗️
A constructor is a reserved function that when written in our code it can only be called once and that is at deployment😮💨. So yeah let's add a constructor to our code😊.
// SPDX-License-Identifier: MIT
pragma solidity ^0.8.18;

contract ERC20Token {
    //After the state variables
    constructor(
        string memory _name,
        string memory _symbol,
        uint8 _decimals,
        uint256 _totalSupply
    ) {
        s_name = _name;
        s_symbol = _symbol;
        s_decimals = _decimals;
        s_totalSupply = _totalSupply;
    }
}
now the constructor takes in some argument from the deployer and stores it in our state variables. You might be asking why are we adding memory to our string data typed argument _nameand_symbol . Well memory is a location we temporary store data, especially data's that are declared in a local scope called local variables. To know more about storage check this.
4. Add Our View functions 🪟
Remember in the beginning of this article I listed out the different functions needed in an Token for it to meet ERC-20 standard, so now it is time for us to implement it.
// SPDX-License-Identifier: MIT
pragma solidity ^0.8.18;

contract ERC20Token {
    //After the constructor
    function name() external view returns (string memory) {
        return s_name;
    }

    function symbol() external view returns (string memory) {
        return s_symbol;
    }

    function decimals() external view returns (uint8) {
        return s_decimals;
    }

    function totalSupply() external view returns (uint256) {
        return s_totalSupply;
    }

    function balanceOf(address _owner) public view returns (uint256 balance) {
        balance = s_balances[_owner];
    }

    function allowance(
        address _owner,
        address _spender
    ) public view returns (uint256 remaining) {
        remaining = s_approvedSpenders[_owner][_spender];
    }
}
So yeah we have added the view functions. You can see view functions as getters, their job is to get a value from storage(states variables) or read from storage. You may also ask me why do we have external in some functions and public in other functions well these are what we call visibilities in solidity, if you look back to when we declared the state variables step 2 we set the visibilities of our state variables to private. Solidity has 4 types of visibilities:
Public: Any function or variable with this visibility can called both outside and inside the contract it is declared in.
Private: Any function or variable with this visibility can only be called inside the contract it is declared in.
External: Any function with this visibility can only be called outside the contract it is declared in.
Externalvisibility does not apply to state variables.Internal: Any function or variable with this visibility can only be called inside the contract it is declared in. The difference between
PrivateandInternalis that when the Contract is inherited by a child contract, the child contract can access functions or variables withInternalvisibilities. The default visibility for state variables isInternal.
5. Add Our Transfer Functions💸
So now it is time for us to add the functions that will give our token wings to move from one address to another 💸🤑.
// SPDX-License-Identifier: MIT
pragma solidity ^0.8.18;

contract ERC20Token {
    //Add this after the view functions
    function transfer(address _to, uint256 _amount) external returns (bool) {
        require(_amount <= balanceOf(msg.sender), "Insufficient Balance");
        require(_to != address(0), "Can't send to zero address");
        uint256 _cut = (_amount * 10) / 100;
        s_balances[msg.sender] -= (_amount - _cut);
        s_balances[_to] += (_amount - _cut);
        _burn(msg.sender, _cut);
        emit Transfer(msg.sender, _to, (_amount - _cut));
        return true;
    }

     function transferFrom(
        address _from,
        address _to,
        uint256 _value
    ) public returns (bool success) {
        require(_value <= allowance(_from, msg.sender), "No Allowance");
        require(_value <= balanceOf(_from), "Insufficient Balance on owner");
        require(_to != address(0), "Recipient can't be zero address");
        uint256 _cut = (_value * 10) / 100;
        s_balances[_from] -= (_value - _cut);
        s_balances[_to] += (_value - _cut);
        s_approvedSpenders[_from][msg.sender] -= (_value - _cut);
        _burnFrom(_from, _cut);
        emit Transfer(_from, _to, (_value - _cut));
        success = true;
    }
}
Wow!!! 😮, I know right like what is happening here?🧘♂️ relax let's break this down. So remember I told you that we were going to charge 10% of the amount he was transferring and then burn it, so that is what both functionsares doing. Let's take it line by line:
P.S: you might see some red lines due to the fact that we have not created a particular function just ignore it, they will be resolved soon. Okay, let's continue.
transfer:
require(_amount <= balanceOf(msg.sender), "Insufficient Balance");this checks if the amount being transferred is lesser or equal to the sender's balance. if the amount is greater, it reverts the transaction with the messageInsufficient Balance.require(_to != address(0), "Can't send to zero address");this conducts a sanity check to see if the recipient of the transfer is a zero address(0x0000000000...00). If it is a zero address the transaction is also reverted with the messageCan't send to zero address.uint256 _cut = (_amount * 10) / 100; s_balances[msg.sender] -= (_amount - _cut); sbalances[_to] += (_amount - _cut);this lines of code gets the 10% charge from the amount being transferred and transfers the rest to the recipient._burn(msg.sender, _cut);this is were we call the burn function that burns the_cutout of our total supply.emit Transfer(msg.sender, to, (_amount - _cut));this triggers the Transfer event notifying the client that a transfer has taken place.return true;this returns true when all the operations were carried out smoothly.
transferFrom:
require(_value <= allowance(_from, msg.sender), "No Allowance");this checks if the sender of this transaction is allowed to transfer the amount(_value) from the owner balance. If the sender is not allowed it will revert with the messageNo Allowance.require(_amount <= balanceOf(_from), "Insufficient Balance on owner");this checks if the amount being transferred is lesser or equal to the owner's balance. if the amount is greater, it reverts the transaction with the messageInsufficient Balance on owner.require(_to != address(0), "Can't send to zero address");this conducts a sanity check to see if the recipient of the transfer is a zero address(0x0000000000...00). If it is a zero address the transaction is also reverted with the messageCan't send to zero address.uint256 _cut = (value * 10) / 100; s_balances[_from] -= (_value - _cut); sbalances[_to] += (_value - _cut); sapprovedSpenders[_from][msg.sender] -= (_value - _cut);this lines of code gets the 10% charge from the amount being transferred, transfers the rest to the recipient, and also substract the rest from the sender's allowance balance._burnFrom(_from, _cut);this is were we call the burn function that burns the_cutout of our total supply.emit Transfer(_from, to, (_amount - _cut));this triggers the Transfer event notifying the client that a transfer has taken place.success = true;this returns truesuccesswhen all the operations were carried out smoothly.
😮💨Yeah that's a lot but, we are getting closer to finishing our Token so let's move.
6. Create The Approve Function 🤝
So now we have to create a function that allows an address give another address the right to transfer from there balance. so let's get to it...
// SPDX-License-Identifier: MIT
pragma solidity ^0.8.18;

contract ERC20Token {
    //Add this after the transferFrom function
    function approve(
        address _spender,
        uint256 _value
    ) external returns (bool success) {
        require(_spender != address(0), "Zero Address can't be a spender");
        s_approvedSpenders[msg.sender][_spender] = _value;
        emit Approval(msg.sender, _spender, _value);
        success = true;
    }
}
This is it, our approve function takes two argument the _spender the address the owner wants to approve, and the _value the amount the address can transfer from its balance, then it goes ahead and execute the following:
require(_spender != address(0), "Zero Address can't be a spender");this conducts a sanity check to see that the_spenderis not a zero address, if it is then it will revert the transaction with the messageZero Address can't be a spender.s_approvedSpenders[msg.sender][_spender] = _value;this approve the_spenderby adding it to the owner'ss_approvedSpendersmapping.emit Approval(msg.sender, _spender, _value);this triggers the Approval event letting the client know that an address(msg.sender) just approved a_spenderto be able to transfer_valueof Token from its balance.success = true;we return success when all operations were carried out successfully.
7. Creating Our Events 🚨
We have emitted two events so far but we have not defined them, so let's go ahead and create them.
// SPDX-License-Identifier: MIT
pragma solidity ^0.8.18;

contract ERC20Token {
    //Add this after the state variables
     event Transfer(
        address indexed _from,
        address indexed _to,
        uint256 _value
    );
    event Approval(
        address indexed _owner,
        address indexed _spender,
        uint256 _value
    );
    //the rest of the code
}
We know an event does, so now we an indexed event so that we will be able to query this information later on in our transaction logs topics.
8. Create Our Mint & Burn Functions 💷🔥
So what does it mean to mint? we can look at it from this stance of when our government decides to print more funds they have decided to add more money to circulation same thing here we are adding more tokens to our total supply, and when we burn the reverse happens.
// SPDX-License-Identifier: MIT
pragma solidity ^0.8.18;

contract ERC20Token {
    //Add this after the approve function
    function _mint(address _owner, uint256 _value) internal {
        require(_owner != address(0));
        s_totalSupply += (_value * (10 ** s_decimals));
        s_balances[_owner] += (_value * (10 ** s_decimals));
        emit Transfer(address(0), _owner, (_value * (10 ** s_decimals)));
    }

    function _burn(address _owner, uint256 _value) internal {
        require(_value <= balanceOf(_owner));
        s_balances[_owner] -= _value;
        s_totalSupply -= _value;
        emit Transfer(_owner, address(0), _value);
    }

    function _burnFrom(address _owner, uint256 _value) internal {
        require(_value <= allowance(_owner, msg.sender));

        s_approvedSpenders[_owner][msg.sender] -= _value;
        _burn(_owner, _value);
    }
}
if you look back to step 5 were we carried out our transfer functions you would see that we were calling the _burn and _burnFrom function well they but do the same task the difference is that we use a _burnFrom when it is the _spender making the transfer and not the owner. Our _mint function takes the address we want to mint our token to and also the amount of tokens we want to mint, then the amount is multiply by the exponential of our decimal value and added to our total supply and the balance of the address.
9. Adding Some Finishing Touch 🏁
We are done with our contract 🎉but, if we look at there is no place in our code that we are calling our _mint function. Let's change that by calling it in our constructor .
constructor(
        string memory _name,
        string memory _symbol,
        uint8 _decimals,
        uint256 _totalSupply
    ) {
        s_name = _name;
        s_symbol = _symbol;
        s_decimals = _decimals;
        s_totalSupply = _totalSupply; //delete this code
        _mint(msg.sender, _totalSupply); //add this code
    }
so what we just did was delete this piece of code s_totalSupply = _totalSupply; and added this code _mint(msg.sender, _totalSupply); that mints the total supply to the address deploying the contract.
So yes we are done 🎉. You can find the complete code here 🥳.
10. Deploying To Sepolia Testnet ⧫
For us to deploy our contract to Sepolia we need to have a Metamask wallet and SepoliEth tokens in our testnet account. You can get the testnet token from a faucet.
Once you have that let's get rolling.
- Compile the code on remix by clicking the play button, and wait for the solidity icon by the side bar to have a green check mark.
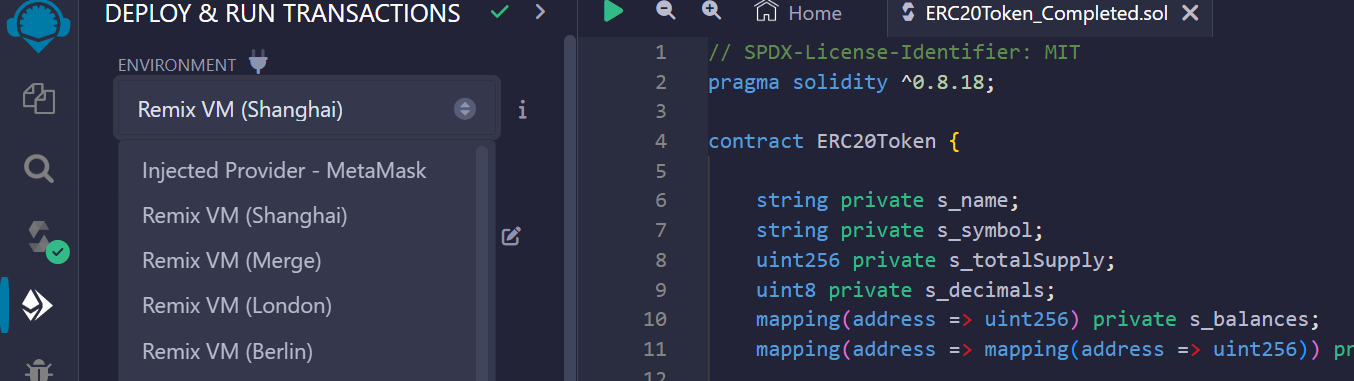
- Now go to the deploy page and select the environment and change it to Injected Provider. this will prompt your Metamask and ask you to connect.
- Now feel in your constructor parameters close to your deploy button.
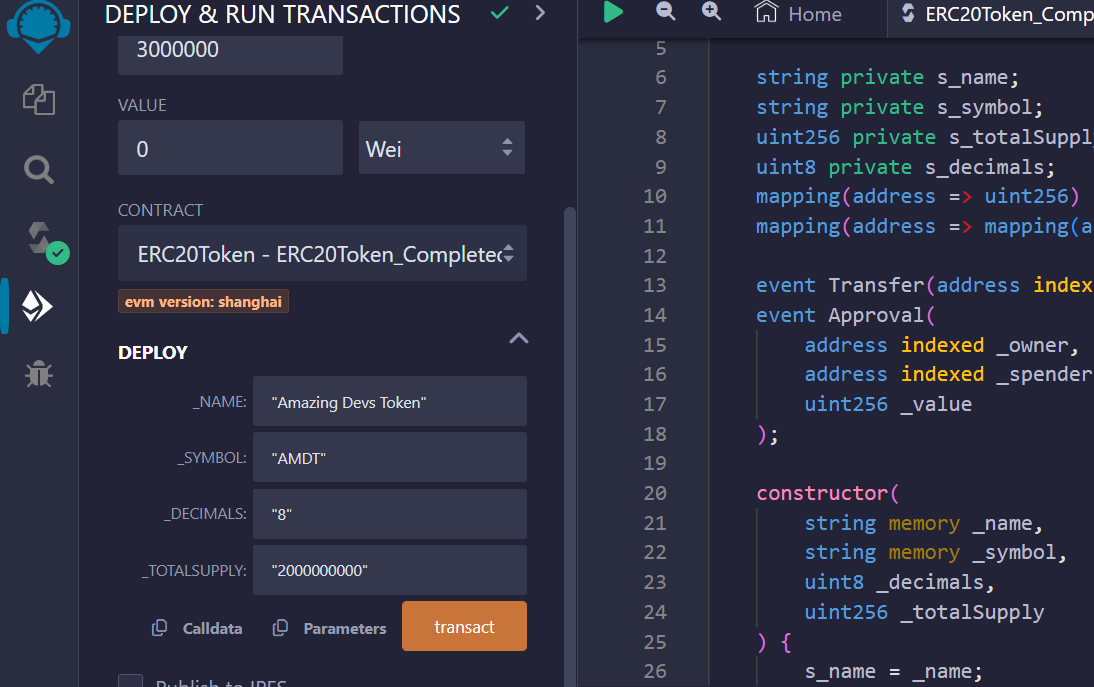
- Click the deploy/transact button, it will prompt you to confirm the transaction on your Metamask.
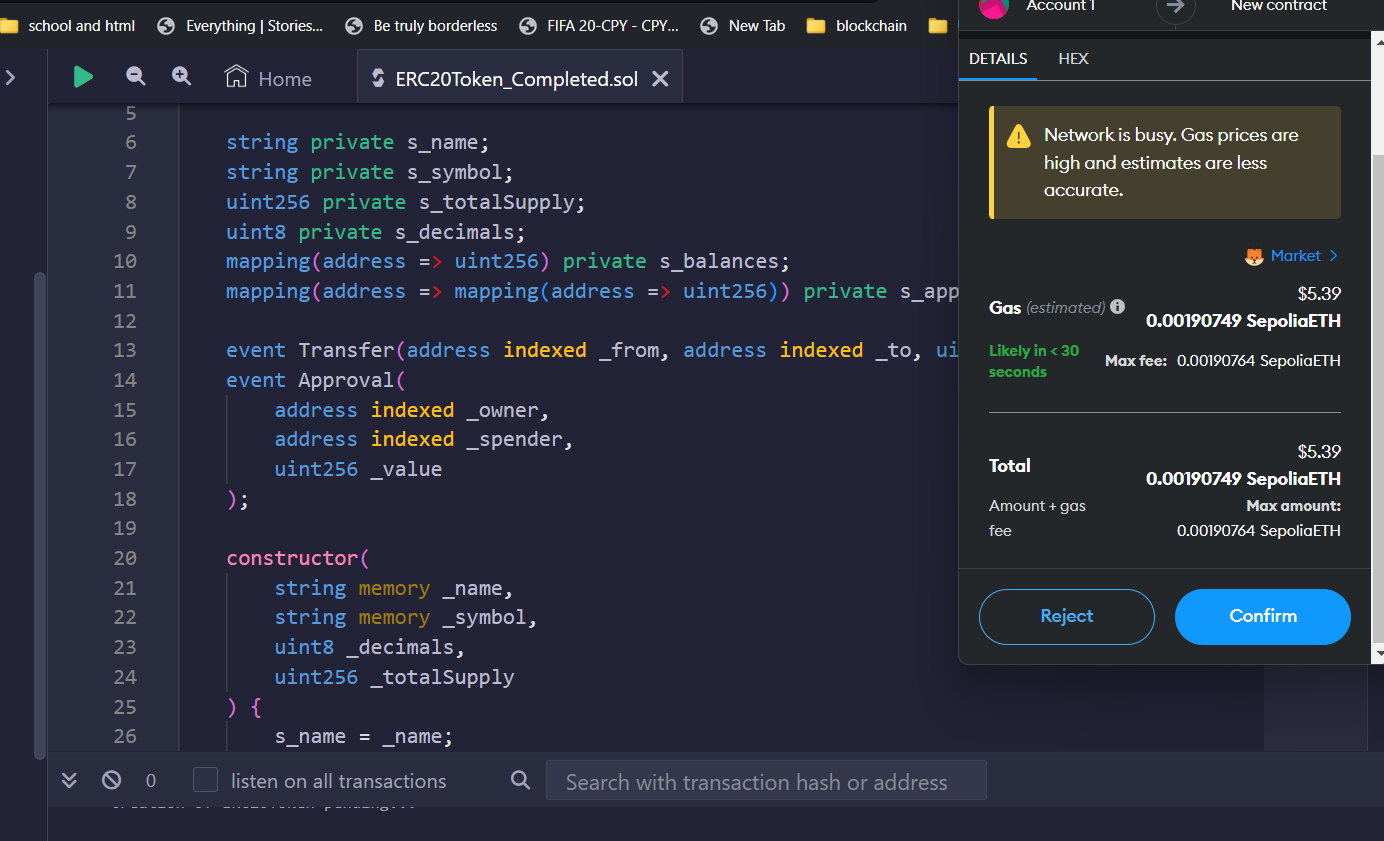
Congratulations you have successfully deployed your token to the Ethereum-Sepolia testnet 🥳🥳🥳.
11. Import The Token In Your Wallet 🛅
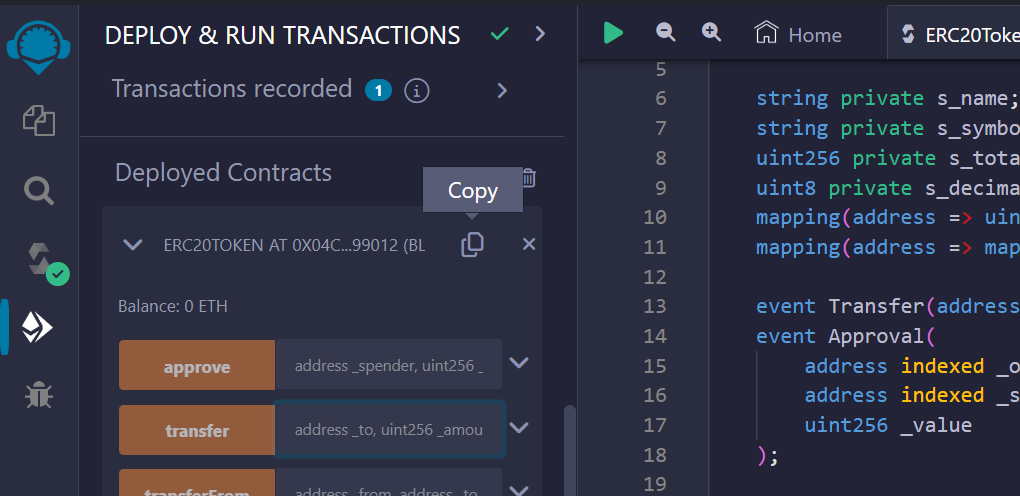
If scroll to the bottom of the left panel you would find your recently deployed smart contract. copy the address.
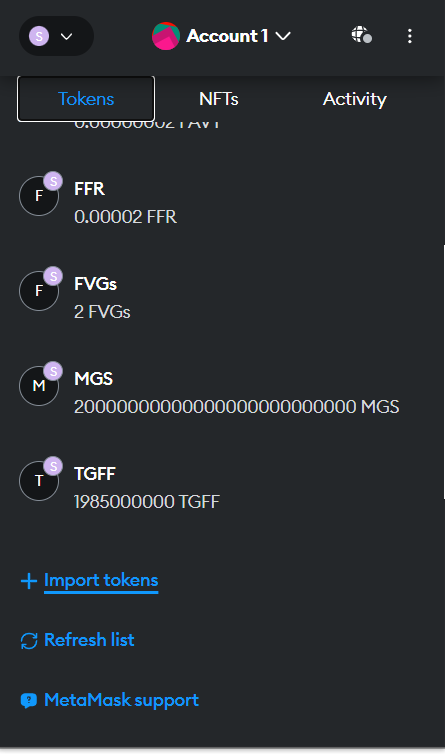
Now open your wallet and click import tokens.
Now paste your token address in the address space and every other information will be loaded automatically.
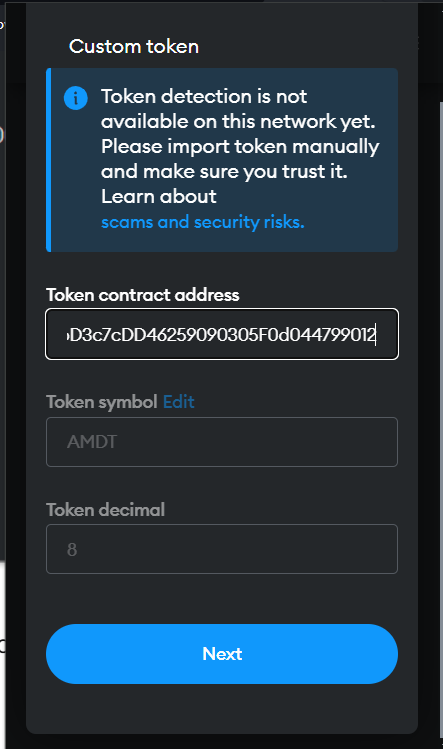
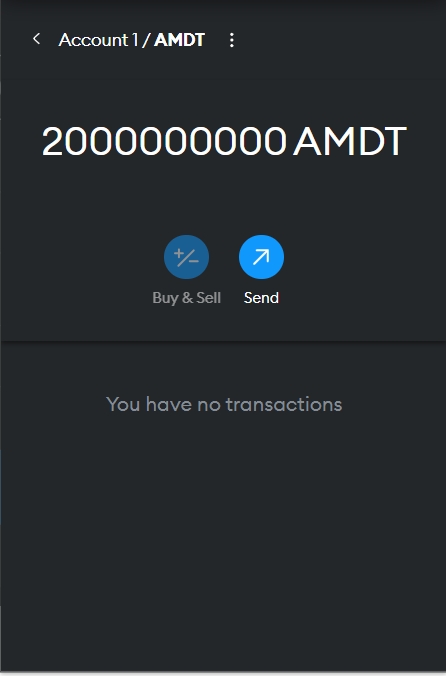
Now click next and import and walla 🎊🎊🎊, you successfully added your token to your wallet 🎊. As you can see I have 2 billion AMDT in my wallet.
Now you send to different persons and test out the transfer logic 🎊. If you got to the end and you want to share your newly minted token with me here is my address 0x4a3aF8C69ceE81182A9E74b2392d4bDc616Bf7c7 .
Thanks for getting here, Please leave a like and comments with your address and questions. I will also love share my newly minted tokens 😌. Stay Amazing ✌️.